The convenience of waxing from home is underrated. Not only do you get to skip the wait at the salon and spa, but you also save money waxing from home. Plus, thanks to advanced DIY wax kits, you still achieve a professional-worthy wax every time.
With gentle yet effective waxing methods, your at-home waxing can be done on sensitive areas along with the legs and thighs. Wax delicate regions, such as the underarm, lip and chin, and bikini areas, from the comfort of home. You can even learn the best methods for waxing different body parts by watching online tutorials for at-home waxing.
The perks make waxing at home worthwhile. Now that you know some of the benefits of at-home wax kits, read on to learn all you need to know about unboxing your wax kit. We have created this guide to help you discover the tools, uses, and best practices to ensure your DIY waxing kit works well for you. Continue reading the article below to learn more.
Setting Up Your Waxing Kit At Home
Before you set up shop, read the instructions carefully. Take note of the contents of your kit, identifying each component to ensure your waxing kit has everything you need to get started.
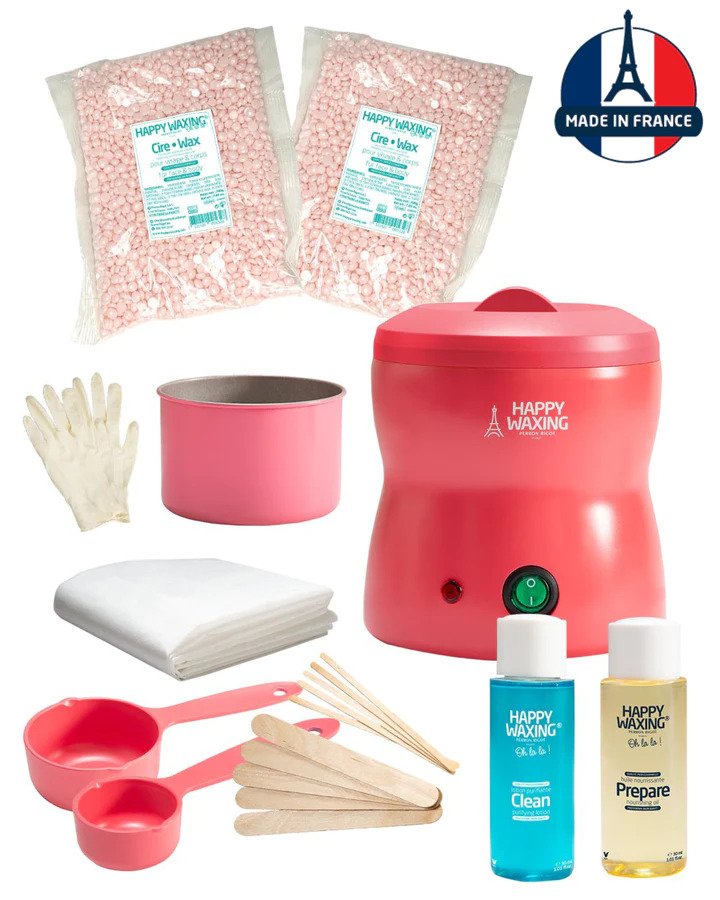
Your kit should contain the following items:
- a wax warmer
- a removable tin
- wax
- lotion
- oil
- reusable sheet
- gloves
- applicators
- measuring cups
Then, spread out your reusable sheet to cover the surface where you plan to sit. Your reusable sheet protects the surface where you’ll do your waxing from wax. From there, put on your vinyl gloves and follow the step-by-step instructions for using the waxing kit.
Note: Your waxing kit contains a warmer that must be placed on a stable surface. Always keep the warmer close to you during use.
Tools, Uses, And Best Practices
Different waxing tools will apply depending on the area you plan to wax. For smaller areas, use the smaller spatula.
Follow the steps below for best practices while waxing.
- Measure out the waxing kit beads (see chart to determine the amount).
- Place beads into the tin and then into the heater.
- Plug in your heater, put the lid on, and switch “On.”
- Wait 30 minutes for the wax to heat. Use the provided spatula to stir wax as needed.
- Test the wax on your inner wrist for warmth. Retest as needed.
- Using the lotion, sit on a flat surface, and clean the area to be waxed.
- Apply wax downward, in the same direction as hair growth.
- Let the wax harden, and hold your skin taut with one hand when ready. With the other, lift the edge of the wax swiftly in the opposite direction of hair growth.
- After waxing, massage the skin with lotion and oil.
A Successful, At-home Wax
You can achieve a successful, at-home wax by following the best practices above. Take your time reading the waxing kit instructions, and when you’re done, remember to flip “Off” and unplug the heater.